
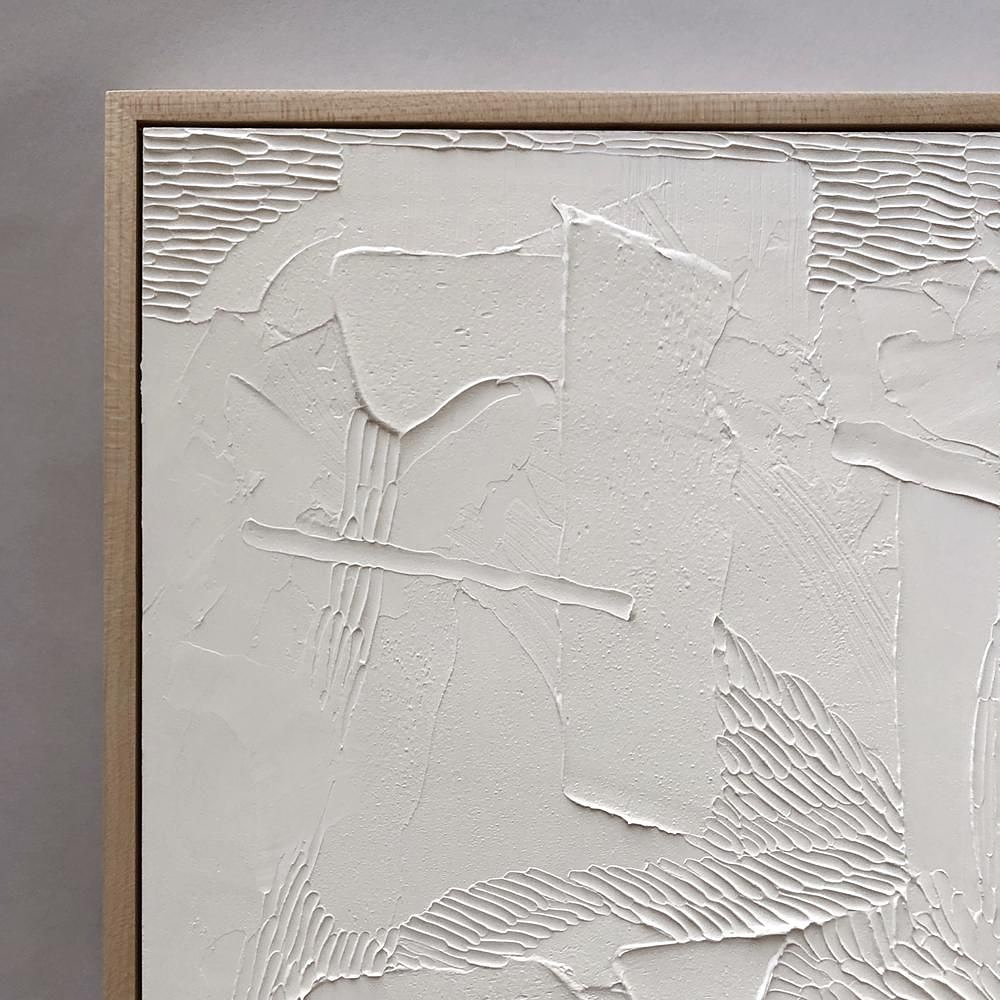
We have been playing with the current trend of plaster art at home to create some art for our walls. It is SO easy and fun that we wanted to share it with you. It's a slow, abstract yet mindful way to get creative.
YOU WILL NEED:
~ Selleys White For Life Grout from Bunnings.
~ Grout spreader, smooth and serrated for different textures or get creative and use items found around your home to apply. (A toothpick, some scrunched paper to stamp the plaster, or some elements from nature.)
~ A canvas in any size - get these from an art / stationery store, 2 dollar shop or just upcycle an old art canvas that no longer fits with your decor!
~ Resene test pots (optional)
HOW TO:
~ If you are using an older canvas, you may want to cover the current art work with some primer or white paint and wait for it to dry completely.
~ Using a flat grout spreader, spread enough grout on to your canvas so it is well covered. Aim for the thickness of the grout overall to be 2-3 mm thick and smooth over as best as you can.
~ Take your texture tools and apply it randomly throughout your canvas. Enjoy the process, and remember that it doesn't need to be perfect.
~ Leave overnight to dry. If you want to add colour, you can paint your colour on now. Once it's dry, it is all ready to be hung up!